The Creality Ender 3 Pro is a highly popular and versatile 3D printer, favored by hobbyists and professionals alike․ Known for its affordability and reliability, it offers improved features over its predecessors, making it a top choice for DIY projects․ Its open-frame design and durable components ensure excellent performance and ease of customization, making it an ideal starting point for both beginners and experienced makers․
Unboxing and Inventory
Unboxing the Creality Ender 3 Pro is an exciting first step in your 3D printing journey․ The printer arrives in a sturdy, well-packaged box designed to protect all components during shipping․ Inside, you’ll find the pre-assembled parts and hardware necessary for assembly․
- The main frame components, including the base, gantry, and uprights, are securely wrapped to prevent damage․
- The X-axis assembly, extruder, and Z-axis parts are included, along with the heated bed and glass print surface․
- Additional items like bed springs, power supply, cables, and belts are neatly organized in separate compartments․
- A hardware package contains screws, nuts, and other small components needed for assembly․
- Tools such as Allen wrenches and pliers are provided to assist with the build process․
Before starting assembly, carefully inspect and verify all parts against the provided inventory list to ensure nothing is missing or damaged․ This step is crucial to avoid delays during the build process․ The clear organization of components reflects Creality’s attention to detail, making the assembly experience more straightforward for users of all skill levels․
Pre-Assembly Checklist
Before diving into the assembly of your Creality Ender 3 Pro, it’s essential to prepare thoroughly to ensure a smooth and successful build process․ Start by verifying the completeness of your inventory against the provided list to confirm that all parts and tools are accounted for․ Organize the hardware and components into categories, such as frame parts, axes, and electronics, to streamline the assembly workflow․
- Ensure all tools, like Allen wrenches and screwdrivers, are easily accessible․
- Designate a clean, stable workspace with sufficient lighting to minimize distractions and potential errors․
- Review the manual or online guides to familiarize yourself with the assembly sequence and identify any specific precautions or requirements․
- Check for any visible damage or defects in the components and contact support if issues are found․
- Charge or prepare the power supply and ensure all cables are properly labeled and organized․
Taking the time to prepare and plan will significantly reduce the risk of complications during assembly․ A well-organized approach not only saves time but also enhances the overall building experience, especially for those new to 3D printing․

Safety Precautions
When assembling and operating the Creality Ender 3 Pro, it’s crucial to prioritize safety to avoid injuries or damage to the printer․ Begin by ensuring all electrical components are handled with care, as improper connections can lead to short circuits or electrical shocks․ Always unplug the printer before working on its internal electronics and avoid touching live wires or components․
- Wear protective gloves and safety glasses when handling sharp or heavy parts, such as metal frames or glass beds․
- Keep loose clothing and long hair tied back to prevent accidental entanglement with moving parts during operation․
- Ensure the workspace is well-ventilated and free from flammable materials, especially when dealing with heated components like the extruder or print bed․
- Avoid touching the heated nozzle or bed during or after assembly, as they can reach extremely high temperatures․
- Never leave the printer unattended during its first power-on or while it’s in operation․
- Use the correct tools for each task to prevent stripping screws or damaging components․
- Keep children and pets away from the assembly area to avoid accidents․
By adhering to these safety guidelines, you can ensure a secure and successful assembly process for your Ender 3 Pro․ Always refer to the manual for specific safety recommendations related to your printer model․
Tools and Materials Needed
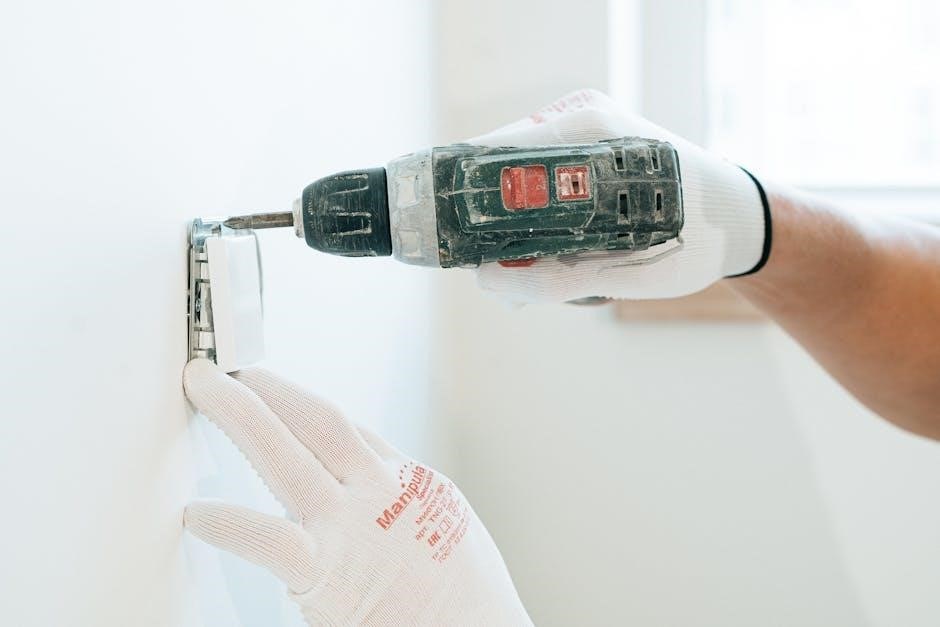
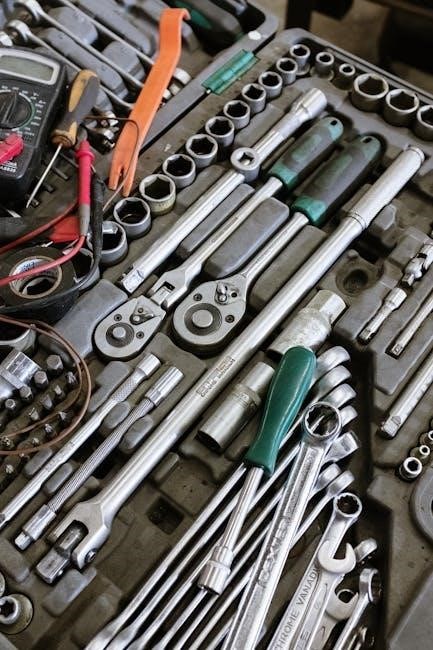
To successfully assemble the Creality Ender 3 Pro, you’ll need a variety of tools and materials․ Start with basic tools like an Allen wrench (3mm and 4mm), a Phillips screwdriver, and a pair of pliers for gripping small parts․ A utility knife or screwdriver can help remove protective covering from the frame․ Additionally, cable ties and electrical tape are essential for organizing wires and ensuring a clean setup․
- A set of metric wrenches or spanners for tightening bolts․
- A level tool to ensure the printer bed is properly aligned․
- Lubricant for smooth movement of linear bearings․
- A multimeter for troubleshooting electrical connections (optional but recommended)․
- A clean, stable work surface for assembling components․
Optional but useful tools include a digital caliper for precise measurements and a spatula for leveling the bed․ Gather all materials from the kit, such as the frame, motors, belts, and electronic components, and ensure they are accounted for before starting․ Having these tools and materials ready will streamline the assembly process and help you avoid delays․
Detailed Assembly Process
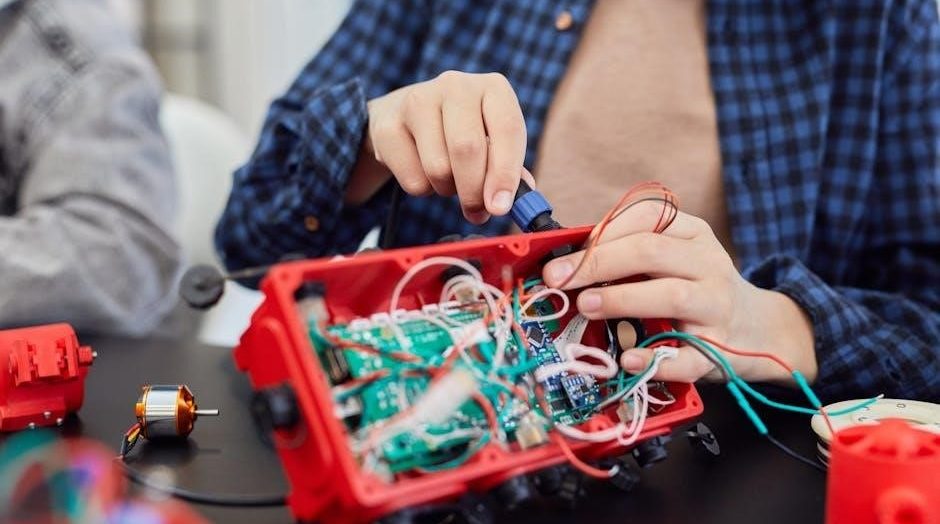
The Ender 3 Pro assembly involves a step-by-step approach, starting with the frame and gantry, followed by installing the X, Y, and Z axes․ Carefully connect the motors, belts, and electronics, ensuring proper alignment and tension․ Use tools like an Allen wrench and screwdriver for secure fastening․ Proceed methodically, organizing cables as you go, and verify each component’s functionality before moving on․ Patience and attention to detail are key to a successful build․
6․1․ Assembling the Frame
Assembling the frame of the Ender 3 Pro is the first and most critical step in the build process․ The frame serves as the foundation for the entire printer, ensuring stability and precision during operation․ Begin by gathering the frame components, including the base, uprights, and top crossbars․ Align the base with the uprights, ensuring they are square and even․ Secure the uprights to the base using the provided screws and washers, tightening them firmly but avoiding overtightening, which could strip the threads․
Next, attach the top crossbars to the uprights․ Use the same care to ensure proper alignment and secure the crossbars with screws․ Double-check the frame’s stability by gently rocking it; any wobble indicates loose connections․ Once the frame is assembled, proceed to install the Z-axis leadscrew and other structural components, following the manual’s instructions for precise alignment․ A well-assembled frame is essential for achieving accurate prints and preventing long-term mechanical issues․
Additionally, ensure all bolts are tightened evenly and use a spirit level to confirm the frame is perfectly horizontal․ If necessary, adjust the feet to level the printer on uneven surfaces․ This step sets the stage for the rest of the assembly process, so take your time to get it right․
6․2․ Installing the X-Axis Assembly
After assembling the frame, the next step is to install the X-axis assembly, which includes the gantry system responsible for moving the extruder․ Begin by carefully unpacking the X-axis components, ensuring all parts are undamaged․ Mount the X-axis gantry to the frame using the provided screws, aligning it with the Z-axis leadscrew․ Tighten the screws securely but avoid overtightening, which could misalign the gantry․
Next, attach the X-axis carriage to the gantry․ This carriage holds the extruder and must be properly seated to ensure smooth movement․ Use the adjustment screws to level the X-axis, ensuring it is parallel to the print bed․ Once aligned, connect the X-axis stepper motor to the motherboard, following the wiring diagram provided in the manual․
Finally, test the X-axis movement by manually sliding the gantry along the Z-axis․ It should move smoothly without binding or wobbling․ If necessary, adjust the X-axis alignment and tighten any loose connections․ Proper installation of the X-axis assembly is crucial for achieving precise and consistent prints, so take the time to ensure everything is correctly aligned and securely fastened․
6․3․ Mounting the Extruder
Mounting the extruder is a critical step in the Ender 3 Pro assembly process, as it is responsible for feeding filament to the hotend․ Begin by attaching the extruder assembly to the X-axis carriage using the provided screws․ Ensure the extruder is securely fastened and properly aligned with the X-axis gantry․ Connect the Bowden tube to the extruder, making sure it is seated firmly in the tube connector to prevent any leaks or kinks․
Next, attach the extruder stepper motor to the motherboard, following the wiring diagram in the manual․ The motor should be connected to the appropriate port labeled for the extruder․ Tighten all connections to avoid loose wires, which could cause malfunctions during printing․ If using a BLTouch or other auto-leveling sensor, ensure it is properly calibrated before proceeding․
Finally, install the hotend onto the extruder, ensuring it is securely fastened with the provided heating block and throat tube․ Double-check all connections, including the PTFE tubing and cooling fans, to ensure they are properly seated and functional․ Proper installation of the extruder is essential for consistent filament flow and high-quality prints․ Take your time to ensure everything is aligned and securely fastened before moving on to the next step․
6․4․ Assembling and Mounting the Z-Axis
The Z-axis assembly is crucial for precise vertical movement in the Ender 3 Pro․ Begin by attaching the Z-axis stepper motor to the printer’s frame using the provided screws․ Ensure it is securely fastened to prevent any movement during operation․
Next, connect the Z-axis leadscrew to the stepper motor using a coupler․ This connection transfers the motor’s rotational motion to the leadscrew, enabling the Z-axis to move smoothly up and down․ Align the leadscrew carefully to avoid any misalignment issues․
Install the Z-axis rods or gantry system to provide stability and guidance for the print head․ Mount these rods securely to the frame, ensuring they are properly aligned and level․ Misalignment here can lead to print defects and poor layer adhesion․
Attach the Z-axis end stops to define the maximum and minimum travel limits․ These sensors prevent the print head from crashing into the print bed or exceeding the build volume․ Adjust them precisely to ensure accurate Z-axis positioning․
Calibrate the Z-axis by adjusting the firmware settings, such as steps per millimeter, to match the new configuration․ If using auto bed leveling, ensure it is correctly configured for optimal first layer adhesion․
Finally, double-check all connections, including electrical wires and mechanical fasteners, to ensure they are secure and functioning properly․ A well-assembled Z-axis is essential for achieving high-quality prints with consistent layer heights and accurate positioning․

Firmware Installation and Configuration
Installing and configuring the firmware is a critical step to ensure optimal performance of your Ender 3 Pro․ The firmware acts as the brain of the printer, controlling all movements and functions․ Start by downloading the latest version of the Marlin firmware, which is widely recommended for the Ender 3 Pro․
Extract the firmware files and open the Configuration․h and Configuration_adv․h files in a text editor․ Modify the settings to match your printer’s specifications, such as the bed size, axis steps, and extruder type․ If you have upgrades like a BLTouch, ensure the firmware is configured to support it․
Use PlatformIO or Arduino IDE to compile and flash the firmware to the printer’s mainboard․ Carefully follow the instructions to avoid errors during the flashing process․ Once installed, restart the printer and test the functionality of all axes and components․
Calibrate the firmware settings, such as the Z-offset and axis steps, to achieve precise prints․ Save your configuration and test the printer with a sample print to ensure everything works correctly․ Regular firmware updates can unlock new features and improve performance․
Remember to back up your configuration before making changes and consult online guides if you encounter issues․ Proper firmware setup is essential for reliable operation and high-quality printing results․
Bed Leveling and Calibration
Bed leveling and calibration are essential for ensuring your Ender 3 Pro prints consistently and accurately․ Start by loosening the springs under the print bed to allow for adjustment․ Use the control panel or manual knobs to move the print head to the home position and prepare for leveling․
Place a piece of paper on the bed and adjust the bed knobs to create a slight drag when moving the print head․ Repeat this process for all four corners of the bed, ensuring even pressure․ Tighten the springs firmly once the bed is level․
If your Ender 3 Pro is equipped with a BLTouch or other auto-leveling sensor, follow the firmware-specific instructions for calibration․ For manual leveling, use the Z-offset adjustment to fine-tune the distance between the nozzle and the bed․ Proper calibration ensures the first layer adheres correctly, preventing print failures․
After leveling, verify the bed by printing a calibration test pattern or a small object․ If the first layer is uneven, adjust the knobs or Z-offset accordingly; Regular recalibration is necessary, especially after transporting the printer or replacing parts․
A well-leveled bed is crucial for achieving high-quality prints, so take your time during this step to ensure accuracy and consistency․

First Print Setup and Testing
After completing the assembly and calibration, it’s time to set up your first print․ Start by ensuring the print bed is clean and free of debris․ Load the filament according to the manufacturer’s instructions, making sure it feeds smoothly through the extruder․
Connect the printer to your computer or use an SD card to upload your chosen 3D model․ Simplify3D, Cura, or Creality Slicer are popular options for slicing the model and preparing the G-code․ Select the appropriate settings for your filament type and print quality․
Once the print file is ready, transfer it to the printer and initiate the print job․ Monitor the first layer closely to ensure proper adhesion and adjust the Z-offset if necessary․ The printer’s LCD screen or connected software will provide real-time updates on the print’s progress․
After the print completes, let it cool before removing it from the bed․ Inspect the print for any defects or inconsistencies․ If issues arise, refer to the troubleshooting guide to identify potential causes and solutions․ A successful first print validates your setup and calibration efforts, marking the beginning of your 3D printing journey․
Troubleshooting Common Issues
Troubleshooting is an essential part of ensuring optimal performance from your Ender 3 Pro․ Common issues often arise during the initial setup or after extended use․ One of the most frequent problems is uneven bed leveling, which can cause poor adhesion or layer shifting․ To resolve this, re-level the bed carefully and ensure all screws are tightened evenly․
Filament jams are another common issue, often due to incorrect temperature settings or debris in the extruder․ Clearing the extruder and adjusting the temperature can usually fix this․ Additionally, layer shifting or misalignment may occur if the belts are loose or misaligned․ Tightening the belts and recalibrating the axes can address this problem․
Some users also experience issues with the printer not responding to commands․ This is often resolved by restarting the printer or updating the firmware to the latest version․ For persistent problems, consulting the user manual or online forums can provide tailored solutions․ Regular maintenance and calibration are key to minimizing these issues and ensuring consistent print quality․

Maintenance and Upkeep
Regular maintenance is crucial to ensure the Ender 3 Pro continues to perform at its best․ Start by cleaning the print bed and frame regularly to remove dust and debris, which can interfere with print quality․ Lubricate the X, Y, and Z axes every 50 hours of use to maintain smooth movement and prevent wear on the rails and bearings․
Inspect the belts and pulleys periodically to ensure they are tight and properly aligned․ Loose belts can lead to layer shifting or misalignment, while worn pulleys may require replacement․ Additionally, clean the extruder and nozzle regularly to prevent clogs and ensure consistent filament flow․
Check the PTFE tubing for signs of wear or deformation, as this can affect the filament’s path to the nozzle․ Replace the tubing if necessary to maintain optimal printing performance․ Lastly, store filament in a dry, cool place to prevent moisture absorption, which can cause print failures or inconsistent extrusion․
By following these maintenance steps, you can extend the lifespan of your Ender 3 Pro and ensure it continues to deliver high-quality prints over time․
Upgrades and Modifications
Upgrading and modifying your Ender 3 Pro can significantly enhance its performance, versatility, and print quality․ One popular upgrade is installing a BLTouch auto-bed leveling sensor, which simplifies bed leveling and ensures consistent first-layer adhesion․ Another common modification is upgrading to a direct drive extruder, which improves handling of flexible filaments like TPU and PETG․
Adding a dual Z-axis upgrade can improve stability and reduce wobble during printing, while upgrading the PTFE tubing to Capricorn tubing minimizes the risk of clogs and improves filament flow․ For better temperature control, users often install an aftermarket heatbreak or upgrade to a metal extruder․ Firmware upgrades are also essential for unlocking advanced features and improving print accuracy․
Other modifications include adding LED lighting for better print visibility, installing silent stepper motor drivers for quieter operation, or upgrading to a 32-bit motherboard for faster processing․ Exploring these upgrades allows you to tailor the Ender 3 Pro to your specific needs, making it a highly customizable and powerful 3D printing tool․
Throughout this guide, we’ve covered everything from unboxing to advanced modifications, ensuring you have the knowledge to maximize your printer’s potential․ The sense of accomplishment from building and fine-tuning your own printer is incredibly rewarding, and the Ender 3 Pro’s versatility ensures it will remain a valuable tool for years to come․
With its active community support and wealth of resources, the Ender 3 Pro is more than just a printer—it’s a gateway to endless creative possibilities․ Embrace the learning process, experiment with upgrades, and enjoy the journey of creating something truly unique with your Ender 3 Pro․
Additional Resources and Support
After completing the assembly and setup of your Ender 3 Pro, you may still have questions or need further guidance․ Fortunately, there are numerous resources available to help you navigate any challenges and unlock the full potential of your printer․
- Official Creality Documentation: Creality provides detailed user manuals and firmware guides on their official website․ These resources are essential for troubleshooting and understanding advanced configurations․
- Community Forums: Online communities like Reddit’s r/3DPrinting and specialized Creality forums are treasure troves of knowledge․ Users share tips, mods, and solutions to common issues․
- Video Tutorials: YouTube channels dedicated to 3D printing often feature step-by-step guides for Ender 3 Pro assembly, upgrades, and maintenance․ These visual aids can be incredibly helpful for hands-on learners․
- Upgrade Guides: Websites like Thingiverse and MyMiniFactory offer printable upgrades for the Ender 3 Pro․ These can enhance performance and customize your printer to suit your needs․
Exploring these resources will not only help you troubleshoot but also inspire you to experiment with new projects․ The Ender 3 Pro community is vast and supportive, ensuring you never feel alone in your 3D printing journey․ Happy printing!