Welcome to the ATEM Mini Pro ISO manual, your comprehensive guide to mastering Blackmagic Design’s powerful live production switcher. This manual covers installation, features, and troubleshooting, ensuring optimal performance for both professionals and hobbyists. Discover how to leverage ISO recording, DaVinci Resolve integration, and live streaming capabilities to enhance your video production workflows.
1.1 Overview of the ATEM Mini Pro ISO
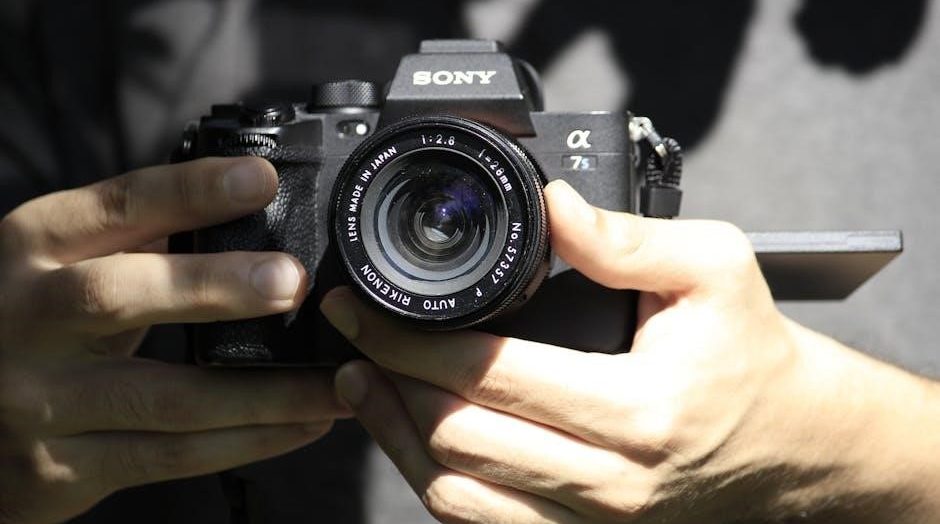
The ATEM Mini Pro ISO is a compact, powerful live production switcher designed for professional and hobbyist use. It features 4 HDMI inputs, a USB webcam output, and ISO recording capabilities, allowing simultaneous capture of all video sources. With integration into DaVinci Resolve, it streamlines post-production workflows. The device also supports live streaming, chroma keying, and audio mixing, making it a versatile tool for high-quality video production. Its user-friendly design ensures easy setup and operation.
1.2 Importance of the Manual for Users
This manual is essential for users to unlock the full potential of the ATEM Mini Pro ISO. It provides detailed guidance on setup, operation, and troubleshooting, ensuring seamless live production and post-production workflows. The manual helps users understand advanced features like ISO recording and DaVinci Resolve integration, making it indispensable for both professionals and hobbyists aiming to produce high-quality video content efficiently.

Getting Started with the ATEM Mini Pro ISO
This section guides you through unboxing, connecting power, and initial setup of the ATEM Mini Pro ISO, ensuring a smooth start to your live production journey.
2.1 Unboxing and Initial Setup
Unboxing the ATEM Mini Pro ISO reveals a compact yet powerful device. Begin by carefully removing the unit from its packaging and inspecting for any damage. Next, locate the included power supply and connect it to the device. Ensure the unit is placed on a stable, flat surface to prevent overheating. Familiarize yourself with the physical controls and ports, such as the HDMI inputs and USB-C output. Before powering on, ensure all necessary cables are ready for connection to cameras, monitors, and external storage. Following these steps ensures a smooth initial setup and prepares you for further configuration.
2.2 Connecting Power and Inputs
First, connect the provided 12V power supply to the ATEM Mini Pro ISO. Ensure the power cord is securely plugged into both the device and a reliable power source. Next, connect your HDMI cameras or video sources to the four HDMI input ports. Additionally, plug in the USB-C cable for webcam output or external drive recording. For streaming, connect an Ethernet cable to the router. These connections ensure seamless power supply and signal flow, enabling live production and recording capabilities.
2.3 Basic Navigation of the Device
Familiarize yourself with the ATEM Mini Pro ISO’s front panel, featuring buttons for source selection, transitions, and audio control. Use the touch screen on the Pro model for intuitive adjustments. The ATEM Software Control Panel offers advanced settings and real-time monitoring. Connect via USB-C for external recording and webcam functionality. Explore the Fairlight audio mixer and media pool for titles. Navigate effortlessly between inputs, transitions, and settings to streamline your live production workflow.
Key Features of the ATEM Mini Pro ISO
The ATEM Mini Pro ISO offers 4 HDMI inputs, USB webcam output, ISO recording, live streaming, and seamless DaVinci Resolve integration for advanced production needs.
3.1 4 HDMI Inputs and USB Webcam Output
The ATEM Mini Pro ISO features 4 HDMI inputs, each with standards conversion, ensuring compatibility with various video sources. The USB webcam output allows connection to computers, enabling use with streaming platforms like Skype or OBS Studio. This dual functionality simplifies live production and streaming workflows, making it ideal for content creators and professionals alike.
3.2 ISO Recording and DaVinci Resolve Integration
The ATEM Mini Pro ISO allows simultaneous recording of all HDMI inputs as separate ISO files, enabling precise editing in post-production. These files seamlessly integrate with DaVinci Resolve, where you can relink them with Blackmagic RAW footage for professional-grade color correction and Ultra HD finishing. This feature streamlines your workflow, enhancing efficiency and creativity in your video production projects.
3.3 Live Streaming Capabilities
The ATEM Mini Pro ISO enables direct live streaming via Ethernet, supporting platforms like YouTube, Facebook, and Twitch. Setup is straightforward using the ATEM Software Control Panel, where you can assign streaming destinations and monitor your broadcast. The device also allows simultaneous USB recording while streaming, ensuring high-quality backups. With its intuitive interface and robust connectivity options, the ATEM Mini Pro ISO is ideal for professional live streaming workflows across various platforms.
3.4 Fairlight Audio Mixer and Chroma Key
The ATEM Mini Pro ISO features the Fairlight Audio Mixer, offering precise control over levels, EQ, and effects for professional-grade sound. Additionally, the built-in chroma key enables seamless green screen effects, allowing for dynamic overlays and transitions. These tools enhance production quality, making the ATEM Mini Pro ISO a versatile solution for live production, streaming, and post-production workflows, ensuring both audio and visual excellence in every broadcast.
Technical Specifications
ATEM Mini Pro ISO supports Mac 10.14+, Windows 10, and requires a 12V power supply. It consumes 30W, ensuring efficient performance for live production and streaming tasks.
4.1 Hardware Specifications and Requirements
ATEM Mini Pro ISO features 4 HDMI inputs, a USB webcam output, and an HDMI output. It requires a 12V power supply, consumes 30W, and supports Mac 10.14+ and Windows 10. The device measures 237.5mm in width and supports up to Ultra HD resolutions. For optimal performance, ensure your system meets these specifications to handle live production and streaming efficiently.
4.2 Compatible Operating Systems
ATEM Mini Pro ISO is compatible with Mac OS 10.14 Mojave, 10.15 Catalina, or later, and Windows 10 (64-bit). Ensure your system meets these requirements for seamless integration with the ATEM Software Control Panel, enabling efficient live production and streaming operations.
4.3 Power Supply and Usage
The ATEM Mini Pro ISO requires an external 12V power supply, delivering up to 30W of power. The USB-C port is dedicated to recording to an external drive, ensuring reliable operation during live productions. This setup guarantees consistent performance, making it ideal for both studio and portable use.
Recording with the ATEM Mini Pro ISO
Discover how to record high-quality video directly to external drives using the ATEM Mini Pro ISO. Learn about ISO file settings, media preparation, and best practices for seamless recording workflows.
5.1 Preparing Media for Recording
Before recording with the ATEM Mini Pro ISO, ensure your external drive is properly formatted and connected. Use a compatible USB-C drive, formatted as exFAT or HFS+, for optimal performance. Connect the drive to the USB-C port on the ATEM Mini Pro ISO. The device will automatically recognize the media, allowing you to start recording. Always check the available storage to avoid interruptions during your session. Proper media preparation ensures smooth, high-quality recording workflows.
5.2 Configuring ISO File Settings
To configure ISO file settings, access the ATEM Software Control Panel and navigate to the recording options. Select your preferred format, such as Blackmagic RAW, and choose the resolution and frame rate that match your project needs. Ensure the external drive is properly connected and formatted. Designate the drive for ISO recordings and confirm sufficient storage space. This setup ensures each input is captured as a separate file, providing flexibility in post-production. Proper configuration is key for seamless recording sessions.
5.3 Best Practices for Recording
For optimal recording sessions, ensure all inputs are properly connected and configured. Format external drives using the ATEM Mini Pro ISO’s built-in utility to avoid compatibility issues. Conduct a test recording to verify settings and media pool content. Maintain stable power supply to prevent data loss. Monitor storage capacity and allocate sufficient space for ISO files. Regularly update firmware and software for enhanced performance and reliability during recording sessions.
Streaming with the ATEM Mini Pro ISO
Streaming with the ATEM Mini Pro ISO is seamless, allowing direct Ethernet streaming while recording. Use the ATEM Software Control Panel to set up destinations like YouTube and Twitch effortlessly.
6.1 Setting Up Streaming Destinations
To set up streaming destinations on the ATEM Mini Pro ISO, use the ATEM Software Control Panel. Assign platforms like YouTube, Facebook, or Twitch as presets. Enter your stream key and configure settings for each platform. Ensure stable internet via Ethernet for reliable streaming. The USB-C port can record simultaneously, allowing multitasking. This feature enables high-quality live broadcasts while maintaining local backups for post-production.
6.2 Connecting to an Internet Router
Connect the ATEM Mini Pro ISO to your internet router using an Ethernet cable for a stable connection. Access the ATEM Software Control Panel to configure network settings. Enter your streaming platform details, such as stream keys, directly in the software. The USB-C port can simultaneously record to an external drive while streaming. This setup ensures reliable live broadcasts and local backups for post-production workflows.
6.3 Troubleshooting Streaming Issues
If streaming issues arise, check your internet connection stability and ensure the Ethernet cable is securely connected. Restart the ATEM Mini Pro ISO and your router. Verify that stream keys and platform settings are correct. If issues persist, update the firmware and ensure all software is up to date. Use high-quality cables to maintain a stable connection for uninterrupted live broadcasts.
Using the ATEM Software Control Panel
The ATEM Software Control Panel offers advanced control over your live production, enabling you to configure settings, manage streaming, and optimize your workflow efficiently.
7.1 Installing and Launching the Software
Installing the ATEM Software Control Panel is straightforward. Download the latest version from the Blackmagic Design website, ensuring compatibility with your operating system; Once installed, launch the software and connect your ATEM Mini Pro ISO via USB or Ethernet. The interface will automatically detect the device, allowing you to access all features for live production management. Ensure your system meets the minimum requirements for smooth operation.
7.2 Key Features and Controls
The ATEM Software Control Panel offers robust tools for live production management. Key features include preset streaming destinations, multi-view monitoring, and Fairlight audio mixing. Users can easily switch between inputs, apply transitions, and manage ISO recordings. The intuitive interface provides access to media pool assets, chroma key settings, and audio levels. These controls empower creators to produce professional-grade content efficiently, ensuring a seamless live production experience.
7.3 Customizing Settings for Optimal Performance
Customize the ATEM Mini Pro ISO settings to enhance your production workflow. Adjust ISO recording preferences, organize media assets, and fine-tune audio levels for clarity. Configure streaming settings for stability and quality, ensuring optimal performance. Explore advanced features like chroma keying and Fairlight mixer presets to tailor your setup. Regularly update firmware and software to access new features and improvements, ensuring your device operates at its best.

Audio Mixing and Chroma Key Features
Master audio with the Fairlight mixer, offering EQ and real-time adjustments for professional sound. Utilize chroma key for seamless green screen effects, enhancing live production quality effortlessly.
8.1 Utilizing the Fairlight Audio Mixer
The Fairlight Audio Mixer delivers professional-grade sound control, offering precise EQ, Dynamics, and level adjustments for each input. Use real-time audio mixing to balance levels, reduce noise, and enhance clarity. With support for multiple audio sources, including HDMI and external inputs, the Fairlight mixer ensures high-quality sound for live productions. Adjustments are made intuitively through the ATEM Software Control Panel, providing a seamless audio experience.
8.2 Setting Up and Using Chroma Key
Set up Chroma Key for green or blue screen effects by selecting the background source and adjusting the keying parameters; Ensure even lighting and a contrasting color between the subject and background for optimal results. Use the ATEM Software Control Panel to fine-tune settings, such as edge adjustment and spill correction, creating a seamless compositing experience for professional-looking live productions.
Troubleshooting Common Issues
Identify symptoms, check connections, and restart devices. Use the ATEM Software Control Panel to resolve errors. Consult the Blackmagic Design Support Center for detailed solutions and guidance.
9.1 Resolving Connectivity Problems
Start by checking all physical connections, ensuring HDMI and USB cables are securely plugged in. Verify network settings for streaming and update firmware if necessary. Restart both the ATEM Mini Pro ISO and connected devices. Use the ATEM Software Control Panel to diagnose issues and consult the Blackmagic Design Support Center for troubleshooting guides and driver updates. Addressing connectivity problems promptly ensures smooth operation.
9.2 Addressing Recording and Streaming Errors
Check storage devices for compatibility and ensure adequate free space. Verify streaming settings match platform requirements. Restart the ATEM Mini Pro ISO and connected devices. Update firmware to the latest version via the Blackmagic Design Support Center. For persistent issues, review error logs and consult the manual or online support resources for detailed troubleshooting steps to resolve recording and streaming errors effectively.
Maintenance and Updates
Regularly update firmware via Blackmagic Design’s support site and clean the device to maintain performance. Ensure proper ventilation for optimal operation and longevity.
10.1 Updating Firmware and Software
Regular firmware and software updates are essential for optimal performance. Visit the Blackmagic Design support website to download the latest updates. Connect your ATEM Mini Pro ISO to your computer via USB and follow the on-screen instructions to install the updates. Ensure the device is powered during the update to avoid interruptions. Updating enhances functionality, fixes issues, and adds new features for improved productivity and reliability.
10.2 Regular Maintenance Tips
Keep your ATEM Mini Pro ISO in prime condition with regular maintenance. Clean dust from vents and ports using compressed air. Check HDMI and USB connections for damage; Update firmware and software regularly to ensure compatibility and performance; Store the device in a dry, cool environment when not in use. Avoid exposure to extreme temperatures or humidity. These practices extend the lifespan and ensure optimal functionality of your ATEM Mini Pro ISO.
Accessories and Compatible Equipment
Enhance your ATEM Mini Pro ISO setup with recommended accessories like external storage drives, USB hubs, and compatible software tools. Ensure seamless integration with Blackmagic Design ecosystem products.
11.1 Recommended External Devices
Expand your ATEM Mini Pro ISO’s functionality with external devices like USB storage drives for ISO recording, audio interfaces for enhanced sound, and Ethernet routers for stable streaming. Additionally, compatible third-party accessories such as control panels and external monitors can enhance your production workflow, ensuring professional-grade results in various live streaming and recording scenarios.
11.2 Integrating with Other Blackmagic Products
The ATEM Mini Pro ISO seamlessly integrates with other Blackmagic products, enhancing your production workflow. Use DaVinci Resolve for post-production, leveraging ISO files for multi-cam editing. Pair it with Fairlight audio tools for professional sound design. Additionally, Blackmagic RAW files from cameras like URSA integrate effortlessly, enabling high-quality Ultra HD finishing. This ecosystem ensures a cohesive and efficient workflow from capture to delivery.

Advanced Features and Tips
Explore advanced features of the ATEM Mini Pro ISO, including multi-cam editing and DaVinci Resolve workflow optimizations. Maximize ISO file usage and streamline your live streaming setup for professional results.
12.1 Maximizing the Use of ISO Files
Maximize ISO file usage by organizing and naming files clearly for easy access. Use an external SSD for ample storage and ensure proper formatting. Relink ISO files in DaVinci Resolve for seamless editing. Set up folders and naming conventions for efficient management. Always check storage availability before recording and verify file integrity post-recording to prevent data loss. This ensures smooth workflows and optimal use of your ATEM Mini Pro ISO’s capabilities.
12.2 Leveraging DaVinci Resolve for Post-Production
DaVinci Resolve seamlessly integrates with ATEM Mini Pro ISO, enabling advanced post-production workflows. Import ISO files directly into Resolve for multi-cam editing and color correction. Use Fairlight for professional audio mixing and relink Blackmagic RAW files for Ultra HD finishing. Organize projects with shared libraries for real-time collaboration. Leverage the DaVinci Resolve Studio for additional features like 3D effects and spatial noise reduction, enhancing your final output with professional-grade tools.
User Community and Support
Explore Blackmagic Design’s extensive support resources, including manuals, forums, and troubleshooting guides. Engage with the vibrant user community for tips and solutions, enhancing your ATEM Mini Pro ISO experience.
13.1 Blackmagic Design Support Center
The Blackmagic Design Support Center offers comprehensive resources for ATEM Mini Pro ISO users. Access detailed manuals, software updates, and troubleshooting guides to resolve common issues. Explore FAQs, technical specifications, and user forums for expert advice and community support. Additionally, find system requirements for optimal performance, ensuring compatibility with your setup. This hub is essential for maximizing your device’s potential and staying updated with the latest features.
13.2 Engaging with the User Community
Engage with the vibrant Blackmagic Design user community to share knowledge, learn tips, and solve challenges. Join forums, groups, and social media platforms dedicated to ATEM Mini Pro ISO users. Participate in discussions, watch tutorials, and collaborate on projects. The community offers valuable insights, troubleshooting advice, and creative workflows. Stay updated on best practices and industry trends by connecting with professionals and enthusiasts worldwide.
Future Updates and Product Evolution
Blackmagic Design continuously evolves the ATEM Mini Pro ISO with firmware updates, adding new features like ISO recording and enhanced DaVinci Resolve integration. Stay informed via official channels for the latest advancements, ensuring your device remains cutting-edge in live production.
14.1 Anticipated Features in Future Models
Future ATEM Mini Pro ISO models are expected to include advanced features like enhanced ISO recording capabilities, improved DaVinci Resolve integration, and expanded live streaming options. Upcoming updates may also introduce higher resolution support, additional HDMI inputs, and more robust audio mixing tools. Blackmagic Design is likely to refine the user interface and connectivity options, ensuring the device remains a leader in live production switchers. Stay tuned for official announcements.
14.2 Staying Informed About New Releases
To stay updated on new ATEM Mini Pro ISO releases, regularly visit the official Blackmagic Design website and subscribe to their newsletter. Engage with the Blackmagic community forum for discussions and announcements. Follow Blackmagic Design on social media platforms for real-time updates. Additionally, monitor industry events like NAB for product launches. This ensures you’re always informed about the latest features and updates for your ATEM Mini Pro ISO.