
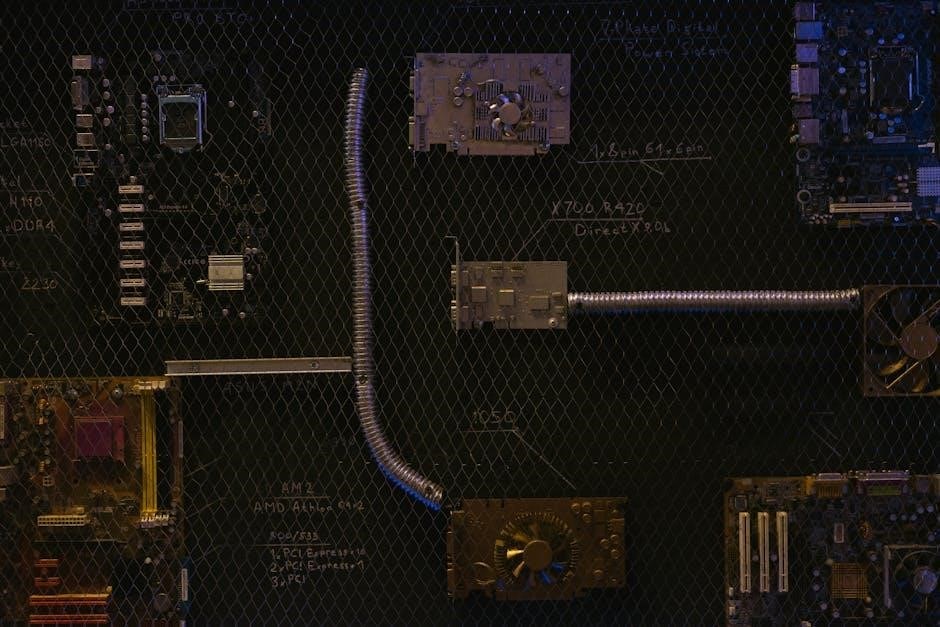
The 2011 Ford F-150 wiring diagrams provide a comprehensive guide to understanding the vehicle’s electrical systems, including circuits for engines, lighting, and accessories, in PDF format.
1.1 Importance of Wiring Diagrams for Vehicle Maintenance
Wiring diagrams are essential for diagnosing and repairing electrical issues in the 2011 Ford F-150. They provide a clear visual representation of the vehicle’s electrical circuits, helping technicians and DIYers identify components, trace wires, and understand system interactions. These diagrams are crucial for troubleshooting problems like faulty sensors, blown fuses, or malfunctioning lights. They also guide installations of aftermarket accessories, ensuring modifications are done safely and correctly. By referencing wiring diagrams, owners can maintain their vehicle’s electrical systems effectively, preventing potential damage and ensuring optimal performance.
1.2 Overview of the 2011 Ford F-150 Electrical Systems
The 2011 Ford F-150 features a complex electrical system managing power distribution, lighting, infotainment, and safety features. The system includes a battery, alternator, fuses, relays, and circuit breakers. Wiring diagrams outline connections for components like the engine control module, anti-theft system, and trailer wiring. These diagrams also detail the integration of advanced features such as remote start and heated seats. Understanding the electrical layout is crucial for repairs, upgrades, and ensuring all systems function seamlessly.

Understanding the Electrical Systems of the 2011 Ford F-150
The 2011 Ford F-150’s electrical systems include the battery, charging system, and circuit protection. Wiring diagrams are essential for understanding and troubleshooting these complex electrical components effectively.
2.1 Battery and Charging System Wiring
The battery and charging system wiring in the 2011 Ford F-150 is crucial for powering essential electrical components. The wiring diagram details connections from the battery to the alternator, ensuring proper voltage regulation. It also outlines circuits for the starter motor and related control modules. Proper wiring is essential to avoid electrical failures and ensure reliable vehicle operation. Consulting the PDF wiring diagram helps diagnose issues like dead batteries or charging malfunctions effectively.
2.2 Fuse Box Locations and Diagrams
The 2011 Ford F-150 features two primary fuse boxes: one in the passenger compartment and another under the hood. The wiring diagram PDF provides detailed layouts of each fuse box, identifying fuses for specific systems like headlights, wipers, and power windows. This guide helps locate blown fuses and understand circuit connections, ensuring quick diagnostics and repairs. Consulting the diagram is essential for tracing electrical issues and replacing fuses correctly to maintain proper vehicle functionality.
2.3 Power Distribution and Circuit Breakers
The 2011 Ford F-150 wiring diagram PDF outlines the power distribution system, detailing how electrical power flows from the battery and alternator to various components. Circuit breakers protect high-current systems like the starter motor and ABS module. The diagram identifies main junction points and relays, ensuring proper connections for accessories. This section is crucial for diagnosing power-related issues and understanding how the electrical system manages load distribution efficiently. It simplifies troubleshooting by providing clear visuals of the circuit pathways.
Wiring Diagrams for Key Vehicle Components
This section covers wiring diagrams for essential components like the engine, transmission, lighting systems, audio, and trailer wiring, ensuring proper electrical connections and functionality.
3.1 Engine and Transmission Wiring
The engine and transmission wiring diagrams for the 2011 Ford F-150 detail the electrical connections for the engine control module, sensors, and solenoids. These diagrams are essential for diagnosing and repairing issues related to fuel injection, ignition timing, and transmission shifting. The wiring layouts are provided in PDF format, covering both 3.5L Turbo and other engine variants, ensuring accurate troubleshooting and maintenance of the vehicle’s powertrain systems.
3.2 Lighting System Wiring (Headlights, Taillights, etc.)
The 2011 Ford F-150 lighting system wiring diagrams detail the electrical connections for headlights, taillights, brake lights, and fog lights. These diagrams, available in PDF format, help technicians and DIYers install or repair lighting components. The wiring layouts include fuse box connections, relay locations, and bulb specifications. Troubleshooting tips, such as using a multimeter to identify short circuits, are also provided to ensure proper functionality of the vehicle’s lighting systems.
3.3 Audio and Radio Wiring Diagrams
The 2011 Ford F-150 audio and radio wiring diagrams provide detailed schematics for installing or repairing the vehicle’s sound system. These diagrams, available in PDF format, outline the connections for the radio, speakers, and amplifier. They include information on wire colors, connector locations, and the body control module’s role in audio functions. The diagrams also cover optional features like steering wheel controls and rear-seat entertainment systems, ensuring seamless integration of aftermarket or upgraded audio components.
3.4 Trailer Wiring and Connectors
The 2011 Ford F-150 trailer wiring and connector diagrams detail the electrical connections required for towing. These diagrams, available in PDF format, illustrate the 7-pin trailer connector setup, including brake lights, turn signals, and auxiliary power. They provide wire color codes, connector locations, and circuit information for proper installation or troubleshooting. The diagrams also cover factory-installed and aftermarket trailer wiring systems, ensuring compatibility with various trailer configurations for safe and reliable towing operations.
Safety and Security System Wiring
The 2011 Ford F-150 wiring diagrams detail the electrical systems for airbags, anti-theft modules, and seat belt sensors, ensuring proper installation and troubleshooting for enhanced vehicle safety.
4.1 Airbag and Crash Sensor Wiring
The 2011 Ford F-150 wiring diagrams include detailed schematics for the airbag and crash sensor systems, ensuring proper installation and functionality. These diagrams outline the electrical connections for the airbag control module, impact sensors, and seat belt pretensioners. Correct wiring is critical to prevent system failures and ensure occupant safety during collisions. The diagrams also provide troubleshooting guides for faulty sensors or modules, helping technicians diagnose issues efficiently. Always refer to official Ford wiring diagrams to avoid installation errors and maintain system reliability for optimal vehicle safety features.
4.2 Anti-Theft System and Immobilizer Wiring
The 2011 Ford F-150 wiring diagrams detail the anti-theft system and immobilizer circuitry, essential for securing the vehicle. These diagrams illustrate connections for the powertrain control module (PCM), keyless entry, and immobilizer sensors. Proper wiring ensures the system activates and deactivates correctly, preventing unauthorized engine start. Incorrect connections can disable the immobilizer, leading to system failure. Always consult the official Ford wiring diagrams to avoid installation errors and maintain the anti-theft system’s functionality for enhanced vehicle security.
4.3 Seat Belt and Pretensioner Wiring
The wiring for the seat belt and pretensioner systems in the 2011 Ford F-150 ensures proper functionality of safety features. Diagrams detail connections for seat belt sensors, pretensioner modules, and the body control module (BCM). These systems monitor seat belt usage and deploy pretensioners during sudden stops or collisions. Incorrect wiring can disable safety features, leading to potential hazards. Always refer to official Ford wiring diagrams to maintain system integrity and ensure proper operation of critical safety components. This ensures occupant protection and compliance with safety standards.

Advanced Features and Accessories Wiring
This section covers wiring for advanced features such as remote start, alarm systems, heated seats, and aftermarket accessories integration in the 2011 Ford F-150.
5.1 Remote Start and Alarm System Wiring
The 2011 Ford F-150 wiring diagram provides detailed schematics for installing remote start and alarm systems. It outlines connections for the brain module, wiring harness, and sensor integrations. The PDF guide highlights critical circuits, such as the ignition, door locks, and alarm triggers. Proper wiring ensures functionality and safety, avoiding electrical conflicts. Use a multimeter to verify connections and consult page 45 of the wiring diagram for specific remote start configurations. Ensure compatibility with aftermarket systems to maintain vehicle security and performance.
5.2 Heated Seats and Steering Wheel Wiring
The 2011 Ford F-150 wiring diagram includes detailed schematics for heated seats and steering wheel systems. It outlines power supply routes, ground connections, and control module links. The PDF guide specifies wiring colors and pin locations for seat heaters and steering wheel controls. Use a multimeter to verify resistance and continuity. Ensure proper insulation and connections to avoid electrical faults. Refer to page 72 for power distribution details and circuit locations to safely install or repair these comfort features.
5.3 aftermarket Accessories Integration
The 2011 Ford F-150 wiring diagram PDF provides detailed instructions for integrating aftermarket accessories like LED lights, winches, and audio systems. Use the diagram to identify power sources, ground points, and connector locations. Ensure compatibility by testing wires with a multimeter and following the circuit layouts. Proper insulation and secure connections are crucial to avoid electrical damage. Refer to page 72 for power distribution details and circuit breaker locations. This guide ensures safe and efficient installation of aftermarket components, enhancing your truck’s functionality and performance.
Wiring Diagram Sources and Resources
Official Ford manuals, online PDF resources, and third-party providers offer detailed wiring diagrams for the 2011 Ford F-150, ensuring accurate electrical system repairs and modifications.
6.1 Official Ford Wiring Diagrams and Manuals
Official Ford wiring diagrams and manuals for the 2011 F-150 are available through Ford’s official website and authorized dealerships. These resources provide detailed, accurate schematics for all electrical systems, including engine, lighting, and accessories. They are essential for precise repairs and modifications, ensuring compatibility and safety. The manuals are typically in PDF format, making them easy to access and reference. They cover various engine options and trim levels, offering comprehensive guidance for professionals and DIY enthusiasts alike.
6.2 Online PDF Resources for 2011 F-150
Online PDF resources for the 2011 Ford F-150 wiring diagrams are widely available through reputable websites and forums. Many platforms offer free or paid downloads of detailed schematics, covering systems like electrical circuits, fuse boxes, and component wiring. These PDFs often include bookmarks for easy navigation and are compatible with various devices. Websites such as imgvehicle.com provide comprehensive diagrams, while forums like Ford F-150 communities share user-contributed resources. Ensure to verify the source for accuracy and reliability when downloading these files.
6.3 Third-Party Wiring Diagram Providers
Third-party providers offer convenient access to 2011 Ford F-150 wiring diagrams in PDF format. Websites like AutoZone, RockAuto, and eBay Motors provide detailed schematics for various systems, including engine, electrical, and accessory circuits. These diagrams are often color-coded and organized by system, making it easier to identify specific components. Additionally, forums and specialty automotive websites share user-contributed wiring diagrams, which can be particularly helpful for custom installations or troubleshooting. Always verify the authenticity and accuracy of these resources to ensure reliability.

Tools and Materials Needed for Wiring Work
Essential tools include a multimeter, wiring harness repair kits, and safety equipment. Pliers, screwdrivers, and heat guns are also necessary for safe and effective wiring repairs.
7.1 Multimeter and Circuit Testing Tools
A multimeter is essential for diagnosing electrical issues in the 2011 Ford F-150. It measures voltage, current, and resistance, helping identify short circuits or faulty sensors. Use it to test battery voltage, check fuse integrity, and verify wiring connections. Digital multimeters are preferred for their accuracy and ease of use. Always ensure the multimeter is set to the correct range to avoid damage. This tool is crucial for safely and effectively troubleshooting the vehicle’s electrical systems, ensuring precise repairs and maintaining system functionality.
7.2 Wiring Harness and Connector Repair Kits
Wiring harness and connector repair kits are essential for maintaining the electrical integrity of the 2011 Ford F-150. These kits provide replacement connectors, terminals, and heat shrink tubing to repair damaged wiring. They are crucial for resolving issues like corroded connectors or frayed wires, which can disrupt communication between electronic components. Using high-quality repair kits ensures reliable connections and prevents future electrical failures. Always refer to the wiring diagram to identify the correct connectors and terminals for your specific repair, ensuring accurate and safe installations.
7.3 Safety Equipment for Electrical Work
When working with the 2011 Ford F-150 wiring diagrams, essential safety equipment includes insulated tools, gloves, safety glasses, and a multimeter. These items protect against electrical shocks and ensure accurate diagnoses. Always disconnect the battery before starting work to avoid live circuits. Using the correct tools prevents accidental shorts or sparks. Proper safety gear and practices are vital to prevent injuries and ensure safe, effective electrical repairs. Referencing the wiring diagram helps identify components and connections, aiding in secure and precise work.

Common Issues and Troubleshooting
Common issues with the 2011 Ford F-150 include blown fuses, faulty sensors, and wiring malfunctions. Use the wiring diagram to identify and test circuits for diagnosis.
8.1 Identifying Blown Fuses and Short Circuits
Identifying blown fuses and short circuits in the 2011 Ford F-150 requires a systematic approach using the wiring diagram. Start by locating the fuse box, referencing the diagram for specific fuse assignments. Use a multimeter to test for voltage drops or continuity. Inspect wiring harnesses for visible damage or corrosion. Short circuits often cause fuses to blow repeatedly, so trace the affected circuit to pinpoint the issue. Always disconnect the battery before performing detailed repairs to avoid electrical shock or further damage.
8.2 Diagnosing Faulty Sensors and Modules
Diagnosing faulty sensors and modules in the 2011 Ford F-150 involves using the wiring diagram to identify connectors and data lines. Start by retrieving trouble codes with a scan tool to pinpoint the affected component. Visually inspect sensors for damage and check wiring connections for corrosion or breaks. Use a multimeter to test power and ground circuits, referencing the diagram for correct signal readings. Consult the wiring diagram to locate and test individual sensors, ensuring they meet specifications. Always disconnect the battery before performing hands-on diagnostics to prevent electrical shock or system damage.
8.3 Resetting the Electrical System
Resetting the electrical system in the 2011 Ford F-150 often involves disconnecting the battery to clear stored codes and recalibrate modules. Start by locating the negative terminal and detaching it, then wait 10-15 minutes to ensure the system fully resets. Reconnect the battery and test the affected systems. If issues persist, use a scan tool to clear OBD-II codes. This procedure is particularly useful for resolving intermittent faults or glitches in sensors and control modules. Always refer to the wiring diagram to identify key electrical components and ensure proper reconnection.

DIY Installation Guides Using Wiring Diagrams
Utilize the 2011 Ford F-150 wiring diagrams to guide DIY installations, such as upgrading stereos or adding remote starters. Refer to PDF resources for clear, detailed instructions and ensure proper connections for reliable performance.
9.1 Upgrading the Stereo System
Upgrading the stereo system in your 2011 Ford F-150 requires precise wiring diagram guidance. Identify key connections for the radio, amplifier, and speakers using the PDF wiring diagram. Ensure proper wiring for power, ground, and speaker outputs to avoid system malfunctions. Refer to the diagram for specific wire colors and locations, such as the audio digital signal processing module under the center console. Test connections with a multimeter before powering up the system to ensure reliability. Always follow safety precautions and consult the manual for detailed instructions.
9.2 Installing a Remote Starter
Installing a remote starter in your 2011 Ford F-150 requires careful use of the wiring diagram PDF. Locate the ignition, start, and accessory wires, typically connected to the ignition switch and body control module (BCM); Use a digital multimeter to test wire functions and ensure proper connections. Refer to the diagram for specific pin locations and wire colors, as variations exist between model years. Connect the remote starter to the BCM and verify all links for power, ground, and ignition signals. Always consult the wiring manual for detailed instructions and safety precautions.
9.3 Adding LED Lighting to the Vehicle
Adding LED lighting to your 2011 Ford F-150 enhances both aesthetics and functionality. Use the wiring diagram PDF to identify suitable power sources and ground wires. For LED strips or light bars, connect to the battery via a relay, ensuring proper fuse installation. Consult the diagram to locate wiring harnesses for headlights or taillights if integrating LEDs there. Test connections with a multimeter to confirm continuity and avoid short circuits. Always follow safety guidelines and refer to the manual for specific instructions to prevent electrical system damage.
Professional Assistance and Resources
Consult a professional mechanic or Ford dealership for complex wiring issues. Online forums and communities also offer valuable resources, including diagrams and troubleshooting tips for your 2011 F-150.
10.1 Consulting a Professional Mechanic
Consulting a professional mechanic ensures accurate interpretation and application of wiring diagrams. They possess the expertise to diagnose and repair complex electrical issues in your 2011 Ford F-150, such as faulty sensors, wiring faults, or system malfunctions. Mechanics have access to specialized tools and Ford-specific knowledge, making them invaluable for resolving issues like non-functioning auto headlights or alarm installations. Their experience minimizes risks of further damage, ensuring safety and proper functionality of your vehicle’s electrical systems. This is especially crucial for advanced features and aftermarket accessories integration.
10.2 Ford Dealership Support and Services
Ford dealerships offer official wiring diagrams and repair manuals for the 2011 F-150, ensuring accurate and reliable information. Their expert technicians can interpret and apply these diagrams to diagnose and repair electrical issues. Dealerships provide genuine Ford parts designed specifically for your vehicle, ensuring compatibility and optimal performance. Additionally, they offer warranty support and advanced diagnostic tools, making them a trusted resource for maintaining and upgrading your truck’s electrical systems effectively.
10.3 Online Forums and Communities
Online forums and communities are invaluable resources for 2011 Ford F-150 owners seeking wiring diagram assistance. Platforms like Ford truck forums and enthusiast groups offer detailed discussions, shared experiences, and downloadable PDF guides. Members often provide step-by-step solutions for common issues, such as troubleshooting auto headlight installations or remote start setups. These communities foster collaboration, allowing owners to learn from others who have successfully navigated similar electrical projects, ensuring reliable and proven solutions for their wiring needs.
Safety Precautions When Working with Wiring
Always disconnect the battery before starting work to prevent electrical shocks. Use a multimeter to test circuits and ensure no power is present. Wear protective gear, including gloves and safety glasses, to minimize risks. Avoid shortcuts and follow the wiring diagram carefully to prevent damage or fire hazards. Properly insulate any exposed wires and ensure all connections are secure before reconnecting the battery.
11.1 Disconnecting the Battery Before Work
Disconnecting the battery is the first step when working with wiring to prevent electrical shocks and damage. Locate the battery, typically under the hood, and loosen the negative terminal clamp. Remove the clamp from the post and set it aside. This ensures no power flows through the system. Use a multimeter to verify the circuit is dead before starting work. Always wait a few minutes and double-check for residual power to ensure safety. Properly secure tools and avoid sparks near the battery area to prevent accidental ignition. This precaution is crucial for safe wiring work on your 2011 Ford F-150.
11.2 Avoiding Electrical Shock and Fire Risks
Avoiding electrical shock and fire risks is critical when working with wiring. Always disconnect the battery and ensure the system is dead before starting. Use insulated tools to prevent direct contact with live circuits. Never work near open flames or sparks, as this could ignite flammable gases or materials. Keep a fire extinguisher nearby and avoid overloading circuits. Grounding yourself and wearing protective gear, such as gloves, further reduces risk. Consult the wiring diagram to identify live circuits and plan your work carefully to prevent accidents and ensure a safe repair process for your 2011 Ford F-150.
11.3 Proper Use of Tools and Equipment
Using the correct tools and equipment is essential when working with wiring diagrams for your 2011 Ford F-150. Always use a multimeter to test circuits and ensure power is off before starting work. Insulated tools prevent electrical shock, while wire strippers and crimpers ensure secure connections. Refer to the wiring diagram to identify components and plan your approach. Wearing safety glasses and gloves protects against debris and sparks. Keep tools well-maintained and avoid using makeshift or damaged equipment, as this can lead to errors or accidents. Proper tool usage ensures safe and effective repairs.
The 2011 Ford F-150 wiring diagram PDF is an essential resource for DIY repairs and professional maintenance, offering detailed guidance for electrical system troubleshooting and upgrades. Use it wisely to ensure safety and precision in all modifications or repairs, and always refer to official Ford manuals for the most accurate information. This comprehensive guide empowers owners to maintain and enhance their vehicle confidently.
12.1 Summary of Key Points
The 2011 Ford F-150 wiring diagram PDF is a crucial tool for understanding and maintaining the vehicle’s electrical systems. It provides detailed schematics for components like the engine, lighting, and accessories, ensuring precise repairs and upgrades. By referencing official Ford manuals and online resources, owners can troubleshoot issues effectively. Always use proper tools and follow safety guidelines to avoid electrical hazards. This guide empowers drivers to maintain their truck’s performance and integrate aftermarket accessories confidently, making it an indispensable resource for both DIY enthusiasts and professionals.
12.2 Encouragement for Further Learning
Exploring the 2011 Ford F-150 wiring diagram PDF is just the first step in mastering electrical diagnostics and repairs. Encourage further learning by delving into advanced topics like circuit analysis and sensor calibration. Utilize official Ford manuals, online forums, and tutorials to deepen your understanding. Practical experience, combined with theoretical knowledge, will enhance your ability to troubleshoot and customize your vehicle confidently. Stay curious, experiment safely, and embrace the evolving world of automotive technology to become a skilled DIY enthusiast or professional mechanic.