
A wiring diagram is a visual guide illustrating the electrical connections and components of an electric scooter. It helps users understand, maintain, and repair their scooter’s electrical system effectively.
1.1 What is a Wiring Diagram?
A wiring diagram is a detailed schematic representation of an electric scooter’s electrical system. It illustrates the connections between components like the motor, battery, controller, and throttle. This visual guide simplifies complex circuits, making it easier to understand how parts interact.
The diagram is essential for installation, troubleshooting, and repairs. It helps identify wire colors, connections, and component placements, ensuring safe and correct modifications. Whether you’re diagnosing faults or upgrading your scooter, a wiring diagram is an invaluable resource.
1.2 Importance of Wiring Diagrams for Electric Scooters
A wiring diagram is crucial for understanding and maintaining an electric scooter’s electrical system. It provides a clear visual guide for identifying components, diagnosing issues, and ensuring proper connections. This resource is essential for troubleshooting common problems like short circuits or faulty connections, helping users repair and upgrade their scooters safely and efficiently.
By following a wiring diagram, users can avoid electrical hazards and ensure their scooter operates optimally. It is a vital tool for both novices and experienced enthusiasts, promoting safety and effective maintenance.
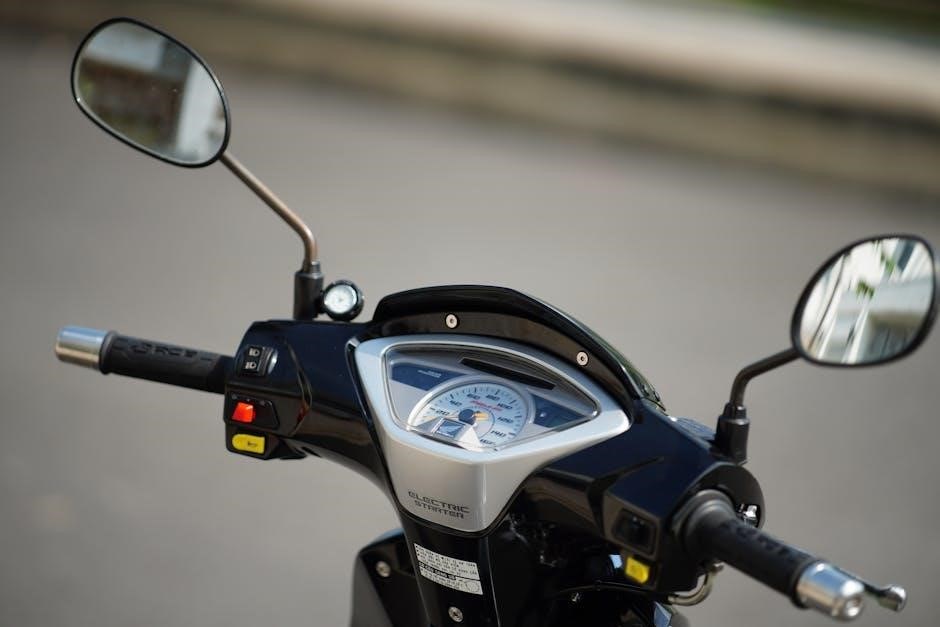
Understanding Electric Scooter Components
Electric scooters consist of key components like motors, controllers, batteries, throttles, brakes, and electrical connectors. These parts work together to power and control the scooter’s movement and functionality.
2.1 Motor and Controller
The motor powers the scooter’s movement, while the controller regulates energy flow from the battery to the motor. Together, they ensure efficient operation. The motor type (brushed or brushless) affects performance, with brushless motors offering higher efficiency and durability. The controller’s wiring connects to the throttle, brake, and battery, managing speed and torque. Proper wiring ensures smooth acceleration and prevents overheating. Understanding their connections is crucial for maintenance and repairs, as detailed in wiring diagrams.
2.2 Battery and Charger
The battery is the power source of an electric scooter, typically ranging from 24V to 60V. It stores energy used to propel the scooter. Chargers replenish the battery, ensuring proper voltage and current. Wiring diagrams detail connections between the battery, controller, and motor, essential for safe and efficient operation. Incorrect wiring can cause damage or safety hazards. Regular maintenance, like checking voltage with a multimeter, ensures optimal performance and longevity of the electrical system.
2.3 Throttle and Brake Systems
The throttle controls the scooter’s speed by regulating power to the motor, while the brake system ensures safe stopping. Wiring diagrams detail connections between these components, sensors, and the controller. Proper wiring ensures smooth acceleration and reliable braking. Faulty connections can lead to performance issues or safety hazards. Regular inspection of wires and connectors is crucial for maintaining optimal functionality and rider safety. Accurate diagrams guide repairs and upgrades, ensuring all systems operate seamlessly together.
2.4 Electrical Connectors and Wires
Electrical connectors and wires are essential for connecting components like the motor, battery, and controller. High-quality copper wires ensure optimal conductivity, while PVC insulation protects against damage. Connectors like bullet or spade terminals provide secure connections. Proper wiring and insulation are critical to prevent short circuits or power loss. Regular inspection and maintenance of these components ensure reliable scooter performance and longevity. Using the correct gauge and type of wire is vital for safety and efficiency in the scooter’s electrical system.
Voltage-Specific Wiring Diagrams
Voltage-specific wiring diagrams provide detailed electrical layouts for 24V, 36V, 48V, and 60V systems, ensuring proper connections and safe operation of electric scooter components at varying power levels.
3.1 24V Electric Scooter Wiring Diagram
A 24V electric scooter wiring diagram outlines the connections for a lower voltage system, typically used in entry-level scooters. It details the battery, motor, controller, and throttle links, ensuring safe and efficient operation. This diagram is essential for troubleshooting and maintenance, providing a clear visual guide for users to understand the electrical flow and component interactions in their 24V scooter.
3.2 36V Electric Scooter Wiring Diagram
A 36V electric scooter wiring diagram provides a detailed layout of the electrical connections for a mid-range voltage system. It illustrates the battery, motor, controller, and throttle connections, ensuring proper circuit flow. This diagram is crucial for troubleshooting and maintenance, offering a clear visual guide to understand the scooter’s electrical setup. It helps users identify components and their interactions, making repairs and upgrades safer and more efficient;
3.3 48V Electric Scooter Wiring Diagram
A 48V electric scooter wiring diagram outlines the electrical connections for higher-power models, detailing the battery, motor, and controller setup. It specifies wiring for hall sensors, brakes, and power lines, ensuring safe and efficient operation. This diagram is essential for understanding complex systems, aiding in troubleshooting and upgrades. By following it, users can maintain their scooter’s performance and ensure all components function harmoniously.
3.4 60V Electric Scooter Wiring Diagram
A 60V electric scooter wiring diagram provides detailed connections for higher-voltage systems, ensuring optimal performance and safety. It outlines the wiring for advanced components, including the battery, motor, and controller, while highlighting hall sensor connections and power distribution. This diagram is crucial for maintaining and upgrading high-power scooters, offering a clear guide for troubleshooting and customizations. It ensures all electrical components operate efficiently, supporting the scooter’s enhanced speed and torque capabilities.
Throttle and Controller Wiring
Throttle and controller wiring connects the scooter’s speed controls to its electrical system. Proper wiring ensures smooth acceleration and efficient power management for optimal performance and safety.
4.1 Throttle Wiring Schematic
The throttle wiring schematic outlines the connections between the throttle, controller, and motor. It typically includes three wires: one for power, one for ground, and one for signal. Properly connecting these ensures the scooter accelerates smoothly. Diagrams often show the throttle linked to the controller’s input terminals, while the controller manages power distribution to the motor. This setup allows the scooter to regulate speed based on throttle input, ensuring efficient and safe operation.
4;2 Controller Wiring Connections
The controller acts as the central processing unit, managing power flow between the battery, motor, and other components. Key connections include the battery terminals, motor wires, and sensor inputs. Hall sensors and throttle signals are linked to the controller to regulate speed and torque. Proper wiring ensures smooth acceleration and braking. Always refer to the scooter’s wiring diagram to confirm connections, as incorrect wiring can lead to system malfunctions or safety hazards.

Troubleshooting Common Electrical Issues
Identify short circuits, faulty connections, or damaged wires using a multimeter. Consult the wiring diagram to isolate issues in the power supply or component connections for repair.
5.1 Identifying Short Circuits
Use a multimeter to detect voltage drops or unintended connections. Inspect the wiring diagram to trace wires and locate short circuits. Look for damaged insulation, loose connections, or components bridging circuits. Disconnect power before testing to avoid further damage. Verify continuity between wires and components to isolate faults. Consult the wiring diagram to ensure proper connections and identify mismatches causing shorts. Repair or replace damaged wires and connectors to restore system functionality safely and efficiently.
5.2 Diagnosing Faulty Connections
Examine the wiring diagram to trace connections between components. Use a multimeter to test continuity and voltage at key points. Inspect connectors for corrosion or damage. Check for loose wires or improper soldering. Verify that all connections align with the diagram. Isolate suspect areas to pinpoint faults. Replace or repair faulty connectors and wires to ensure proper electrical flow. Refer to the wiring diagram for accurate troubleshooting and reliable system restoration.
5.3 Repairing Damaged Wires
Identify damaged wires using the wiring diagram. Disconnect the battery to ensure safety. Strip the ends of the damaged wires and splice in new sections. Solder the connections securely and insulate with heat shrink tubing. Test continuity with a multimeter to confirm proper repairs. Reconnect the battery and test the scooter’s functionality. Always follow safety protocols to avoid electrical hazards during the repair process. This method ensures reliable electrical flow and prevents further issues. Use high-quality materials for durability.
Safety Precautions and Best Practices
Always disconnect the battery before working on wiring. Use insulated tools to prevent electric shocks. Ensure proper insulation of wires to avoid short circuits and fires. Follow manufacturer guidelines for safe repairs and maintenance to prevent electrical hazards.
6.1 Working with Electrical Systems Safely
When working with electrical systems, always disconnect the battery first to prevent shocks. Use insulated tools to handle live wires and components. Ensure the scooter is turned off and grounded. Avoid touching electrical parts with bare hands to prevent short circuits. Properly insulate wires and connections to avoid fire hazards. Follow the wiring diagram carefully to identify and connect components safely. Regularly check for worn or damaged wires and replace them immediately. Always refer to the manufacturer’s guidelines for specific safety instructions.
- Disconnect the battery before starting any work.
- Use insulated tools to prevent electric shocks.
- Ensure proper insulation of wires and connections.
- Follow the wiring diagram for accurate connections.
- Regularly inspect wires for damage or wear.
6.2 Proper Use of Tools and Equipment
Using the right tools ensures safe and effective work on your electric scooter’s wiring. Essential tools include a multimeter for testing voltage and connections, wire strippers for preparing wires, and insulated pliers for handling live components. Always use tools according to their intended purposes to avoid damaging the electrical system. Refer to the wiring diagram to identify the correct tools for specific tasks. Proper tool usage prevents accidents and ensures reliable repairs. Follow manufacturer guidelines for tool specifications and safety practices.
- Use a multimeter to test electrical connections.
- Employ wire strippers for clean wire preparation.
- Utilize insulated tools to handle live components safely.
- Refer to the wiring diagram for tool guidance.
- Follow manufacturer recommendations for tool usage.
Manufacturer-Specific Wiring Diagrams
Manufacturer-specific wiring diagrams provide detailed electrical blueprints for brands like Niu KQi3 and Lambretta, ensuring accurate repairs and customizations tailored to each model’s unique configuration.
7.1 Niu KQi3 Wiring Diagram
The Niu KQi3 wiring diagram is detailed in its maintenance manual, offering a clear layout of electrical connections, components, and systems. It aids in troubleshooting and repairs, ensuring riders can identify and fix issues efficiently. The diagram covers parts identification, wiring routes, and connector locations, making it an essential resource for owners and technicians alike. It’s available as a PDF download for easy access and reference.
7.2 Lambretta Scooter Wiring Diagram
The Lambretta scooter wiring diagram provides detailed electrical connections for various models, available as PDF downloads. These diagrams include color-drafted copies of original wiring layouts, covering components like ignition, brakes, and lighting systems. They are essential for maintenance, repairs, and customizations, offering a clear visual guide for technicians and enthusiasts. The diagrams ensure accurate troubleshooting and servicing of the scooter’s electrical system, helping users understand and fix issues efficiently.

Tools and Materials Needed
A multimeter, wire strippers, connectors, and soldering tools are essential for working with electric scooter wiring. Additional materials include heat shrink tubing and electrical tape for secure connections.
8.1 Multimeter for Testing
A multimeter is essential for diagnosing electrical issues in electric scooters. It measures voltage, current, resistance, and detects short circuits. Use it to test battery voltage, ensure proper connections between the motor and controller, and identify faulty components. This tool helps verify wiring integrity and ensures all electrical components function correctly. A multimeter is crucial for safely troubleshooting and maintaining your scooter’s electrical system, preventing potential hazards from incorrect voltage readings or faulty connections.
8.2 Wire Strippers and Connectors
Wire strippers are essential for safely removing insulation from wires, ensuring clean connections. Connectors are used to secure wires to components like motors, batteries, and controllers. Properly stripping and connecting wires prevents electrical failures and short circuits. High-quality connectors reduce resistance and ensure reliable performance. Always use appropriate tools to avoid damaging wires during stripping or connecting. This ensures your electric scooter’s electrical system operates safely and efficiently, minimizing the risk of malfunctions or safety hazards.
Step-by-Step Installation Guide
Begin by connecting the battery to the controller, ensuring proper voltage alignment. Next, wire the motor to the controller and install the throttle and brake systems. Follow the wiring diagram carefully to ensure all connections are accurate and secure. Finally, test each component to verify functionality and safety before full operation.
9.1 Connecting the Battery
Start by locating the battery, typically positioned in the scooter’s base or under the deck. Identify the positive and negative terminals, clearly marked for safety. Connect the positive terminal to the controller using the appropriate wire, ensuring a secure and voltage-matched connection. The negative terminal should be grounded to the frame or motor for a complete circuit. Install a fuse or circuit breaker near the battery to protect against electrical surges. Double-check the wiring diagram for accuracy and test the connections with a multimeter before powering on the scooter. Proper connections ensure safety and functionality, so verify each step meticulously to avoid electrical issues.
9.2 Wiring the Motor and Controller
Begin by aligning the motor’s specifications with the controller for optimal performance. Connect the motor’s phase wires to the controller’s corresponding terminals, ensuring proper color coding or labeling. Attach the hall sensor wires to the controller’s sensor inputs, following the wiring diagram for accuracy. Link the battery’s positive and negative terminals to the controller’s power input, ensuring secure connections. Use the wiring diagram to verify the correct placement of each wire, and test the connections with a multimeter before powering the system. Proper wiring ensures efficient energy flow and safe operation of the scooter.
9.3 Installing the Throttle and Brake
Connect the throttle wires to the controller’s designated throttle input, following the wiring diagram for accurate placement. Ensure the brake lever’s switch wire is linked to the controller’s brake input to enable proper functionality. Secure all connections with heat-shrink tubing or electrical tape. Test the throttle and brake to confirm smooth operation and safety. Refer to the diagram for specific wire color coding and terminal locations to avoid errors during installation.
Advanced Customization and Modifications
Upgrade your scooter’s electrical system for enhanced performance. Add accessories like LED lights or a horn. Refer to the wiring diagram for safe and effective modifications;
10.1 Upgrading the Electrical System
Upgrading your electric scooter’s electrical system can enhance performance and efficiency. Use a wiring diagram to guide modifications, such as installing a higher-voltage controller or motor. Ensure compatibility with your scooter’s battery and components. Refer to the 48V scooter controller wiring diagram for detailed connections. Always test modifications with a multimeter to avoid short circuits. Consult manufacturer guidelines for safe upgrades, and consider professional assistance if unsure. Proper upgrades can significantly improve speed and range, ensuring optimal functionality.
10.2 Adding Accessories
Adding accessories like lights, horns, or USB ports enhances your electric scooter’s functionality. Use a wiring diagram to identify the correct connections for these components. Ensure accessories are compatible with your scooter’s voltage and electrical system. Refer to the wiring schematic for guidance on integrating new features without disrupting core functions. Test connections with a multimeter to avoid short circuits. Proper installation maintains safety and performance, allowing you to enjoy upgraded features seamlessly.
Electric scooter wiring diagrams are essential for understanding and maintaining your vehicle’s electrical system. They guide repairs, customizations, and ensure safety. Refer to them regularly for optimal performance and troubleshooting.
11.1 Final Thoughts on Wiring Diagrams
Electric scooter wiring diagrams are indispensable tools for understanding and working with your scooter’s electrical system. They provide a clear roadmap for troubleshooting, repairs, and customizations. By following these diagrams, users can ensure safety and efficiency when diagnosing or upgrading components. Whether you’re a novice or an experienced technician, keeping a wiring diagram handy is essential for maintaining optimal performance and addressing issues promptly. They truly are the backbone of any successful scooter maintenance or modification project.
11.2 Encouragement for Further Learning
Exploring electric scooter wiring diagrams is just the beginning of understanding your vehicle’s electrical system. Encourage yourself to dive deeper into manufacturer-specific guides, online forums, and repair manuals. Continuous learning will enhance your troubleshooting skills and confidence in customizing or upgrading your scooter. Stay curious, experiment safely, and embrace the journey of mastering your scooter’s electronics. The more you learn, the more you’ll appreciate the intricate engineering behind these vehicles.

Additional Resources
Explore PDF guides, online forums, and manufacturer-specific resources like Niu KQi3 and Lambretta wiring diagrams for in-depth learning and troubleshooting your electric scooter’s electrical system.
12.1 Recommended PDF Guides
Download comprehensive PDF guides for electric scooter wiring diagrams, such as the Niu KQi3 maintenance manual, which includes detailed wiring schematics and troubleshooting tips. The TROTICO CHINA E-SCOOTER manual offers repair info and wiring diagrams for advanced users. These resources cover various scooter models, including 24V, 36V, 48V, and 60V systems, providing clear visual representations of electrical connections and components. They are essential for DIY enthusiasts and professionals alike, ensuring safe and effective repairs.
12.2 Online Communities and Forums
Online communities and forums are invaluable resources for electric scooter enthusiasts. Websites dedicated to models like the Niu KQi3 and Lambretta host discussions on wiring diagrams, repair manuals, and troubleshooting. Users often share PDF guides and DIY tutorials, while experts provide detailed advice. These platforms foster collaboration, offering step-by-step solutions for installations, upgrades, and common issues. They are essential for anyone seeking hands-on guidance or rare documentation for their electric scooter projects.